New plants for free
Loading...
Although many people think of summer as a time of constant gardening chores, I often think of it as a time to slow down. Having spent the spring months busily cleaning, weeding, planting, and mulching, I ease back and focus on my best performers.
When summer arrives with its long, warm days, I replicate my successes by snipping here and there from my well-established shrubs – spirea, deutzia, blue mist (Caryopteris), and St. John’s wort (Hypericum); my outstanding perennials – Russian sage, salvia, and soapwort (Saponaria); and my drought-tolerant succulents.
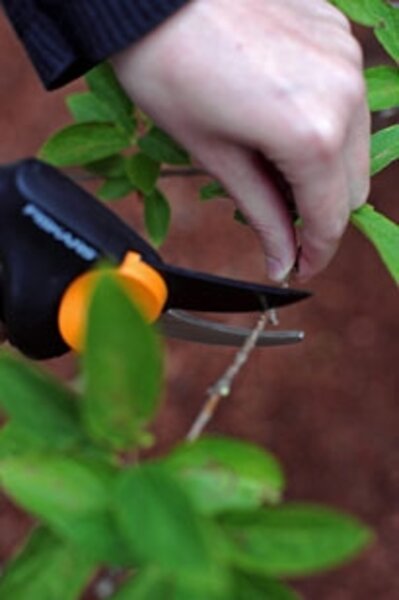
I cut off the top 4 to 6 inches of young stems, just below the node. (The node is where the leaves are attached on the stem – on some plants a node looks like a joint on a stem.)
Most cuttings will begin to form new roots at the node, so it is important to cut just below it to encourage root initiation.
However, this would leave a small, inch-long “stick” on the parent plant so on the parent plant I then cut above the node to remove the “toothpick” for aesthetic reasons.
I always remove the lowest leaves on the cutting, which would just be submerged in soil anyway. I dip the cut end of the stems about one-fourth inch deep in a rooting hormone such as Rootone and tap off the excess.
After poking a finger in moistened soil, I insert one cutting in a four-inch plastic pot that I’ve recycled from a previous plant purchase. To increase aeration, I mix one part crushed perlite (a white rock) to three parts soil for the pots.
There’s no need to buy expensive potting mixes, especially those with fertilizers, as the cuttings don’t remain in the pots for long.
The trick to successful cuttings is to provide enough humidity to prevent dehydration while the stem struggles to form roots. Usually I cover the pots with clear, one-gallon, zippered plastic bags. But any clear plastic bags will do if they are closed with a twist tie.
To prevent the leaves from touching the bag, I insert several plastic knives along the perimeter of the pots before I seal the bags. Then I place the pots in a shady spot on the deck. Too-bright sunlight would “cook” them.
Then you need to practice patience. In the beginning, I would take off the bag after a week because the plants looked just as turgid and healthy as they did before the cut. Thinking that they had rooted, I would toss the bag away, only to find a day later that they had wilted beyond rescue.
So I had to throw them out and start over.
I have since learned to wait at least two weeks before I take the bags off. If I do not feel resistance when I gently tug the stem, no roots have formed yet. If there is resistance, there are some roots.
With plants that have thin leaves that wilt easily, I’ll put the bag back on so more roots can develop.
If the leaves are thick – as they are with succulents – I may take the bag off and force the plant to expand its root structure to ensure survival.
But I always keep the plants in the shade for a few weeks until there are enough roots for them to absorb water on their own. Then I move the potted plants to a spot in full sun.
In the fall, I plant them in the garden, where they will take hold. Although it will take a few years before cuttings from shrubs will be big enough to make an impact, perennials may bloom the next year.
But I must admit another reason for my predilection to propagation: To be able to see part of a stem galvanize its efforts to produce roots where none existed before is no less than magic. Time after time, this never ceases to amaze me.


